What you can set up
HandymanPro can recur two different things for a customer. You can use either one on its own, or both.
| Membership plan | Recurring job | |
|---|---|---|
| What recurs | A flat fee (for example, "VIP Home Care, $39 a month"). No visit is involved. | A real job on your schedule (for example, "Seasonal gutter cleaning, every 3 months"). |
| What is created each cycle | A completed job marked Plan billing, a final invoice, and a payment. | A scheduled job for the tech, with the line items you chose. It is invoiced after the visit, as any job is. |
| When the card is charged | The day the cycle comes due. | After the job is completed and its final invoice is sent, if you turned autopay on for that schedule. |
| Where you define it | Once, in Settings → Payments (the plan catalog). Then enroll customers. | Per customer, on their record. |
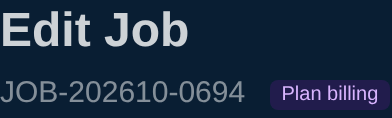
Everything a cycle creates is an ordinary job, invoice and payment, so receipts, the public invoice page, QuickBooks sync and reports all work as usual. Jobs created this way carry a Recurring or Plan billing badge so you can tell them apart.
Before you start
- Stripe must be set up for your account (Settings → Payments). Cards are saved and charged through Stripe; card numbers never touch HandymanPro.
- Permissions. Anyone with the Invoices & Payments permission can save cards and manage a customer's schedules. Only admins can create or edit plans in the catalog, and only admins see Run now.
- Sales tax. A plan can be marked taxable; your account's tax rate is applied on the invoice. Recurring jobs tax their line items the same way regular jobs do.
- Timing. Cycles are processed once a day, early in the morning. A plan enrolled today with today's start date is billed on that first run; Run now (admins) bills it immediately instead of waiting.
Part 1: Create your membership plans
Plans live in a catalog so you define them once and enroll any number of customers.
- Open Settings → Payments and scroll to Membership plans & autopay.
- Click Add plan.
- Fill in the name (this is what prints on the invoice), a short description of what is included (it becomes the invoice line description), the price, how often it repeats (Week, 2 weeks, Month, 3 months, 6 months, Year), and tick Taxable if sales tax applies.
- Click Save plan.
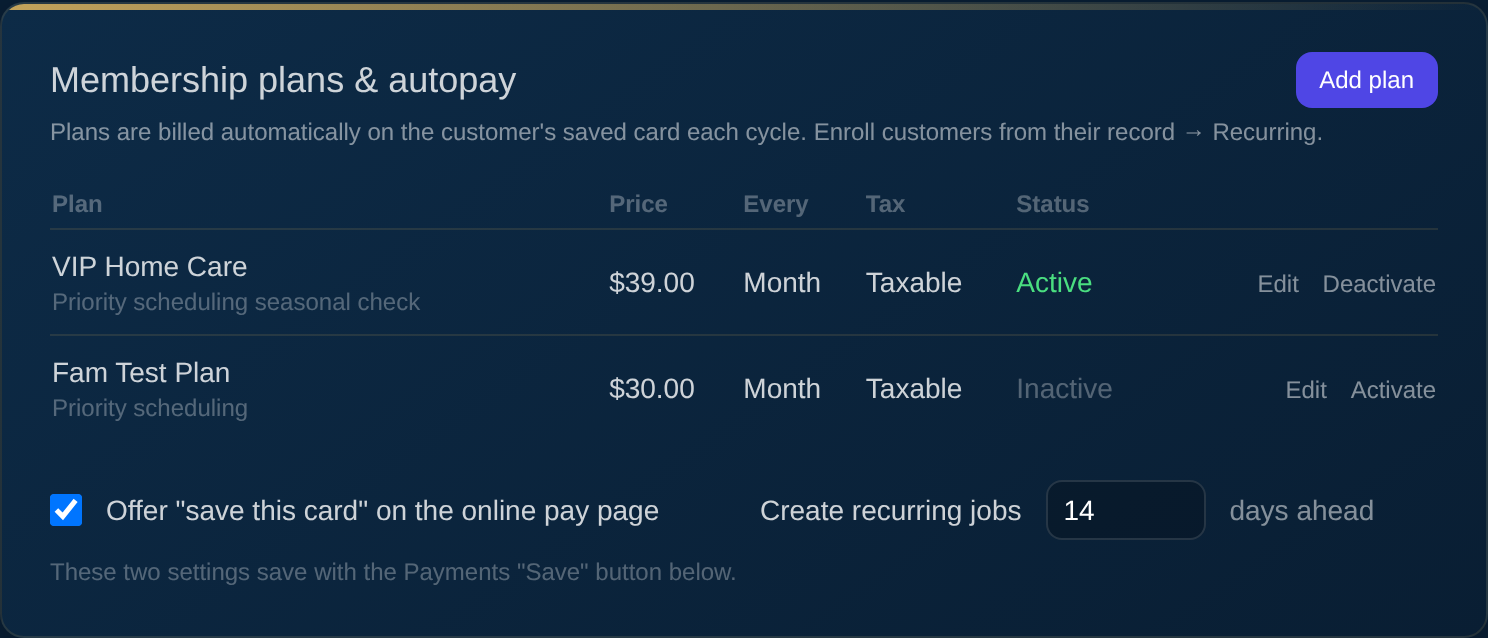
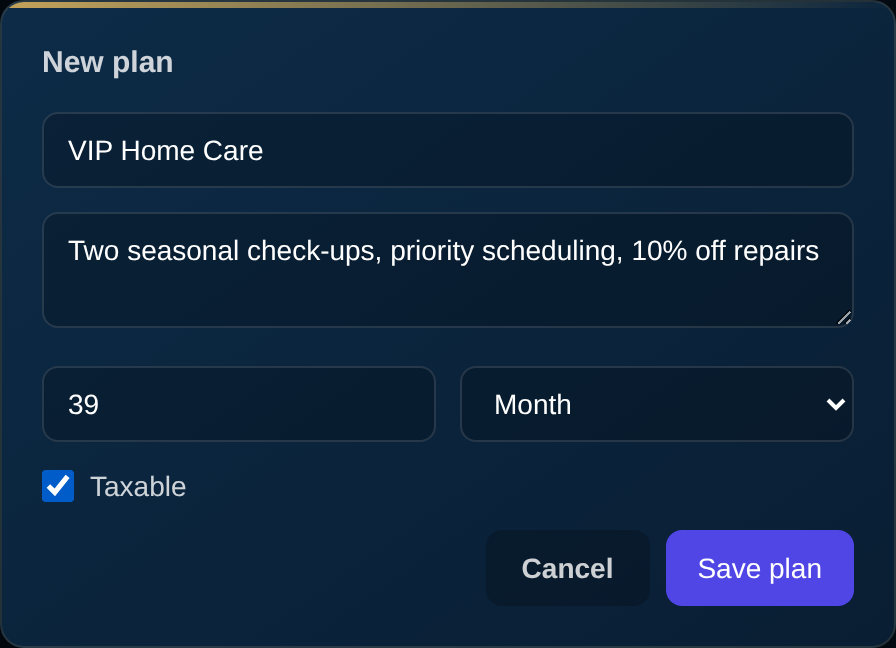
Editing a plan changes the price for the next cycle of every customer on it; cycles already billed are untouched. A customer with a price override keeps their own price. Deactivate hides a plan from new enrollments; customers already on it keep running.
Two settings sit under the table and save with the Payments tab's Save button:
- Offer "save this card" on the online pay page. On by default. When on, customers paying an invoice online see a checkbox to keep their card for future payments (see Part 2).
- Create recurring jobs … days ahead. How far before the service date a recurring job appears on the schedule. The default is 14 days; you can override it per schedule.
Part 2: Save the customer's card
Autopay needs a card on file. There are two ways to get one.
Option A: In the office, on the customer's record
- Open the customer and click the Recurring tab.
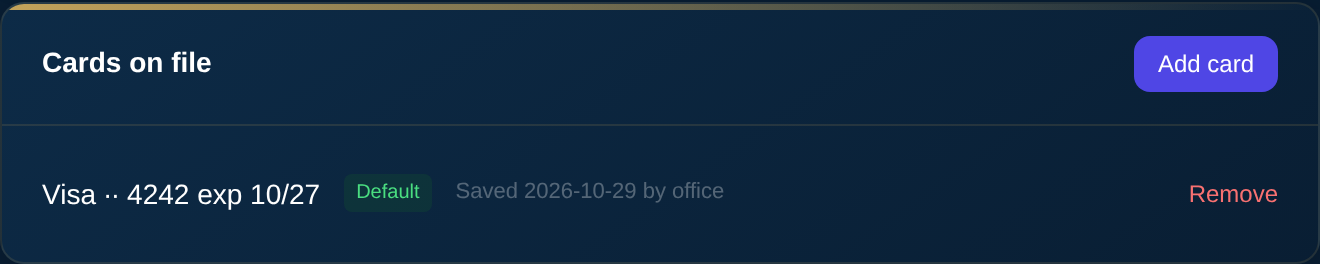
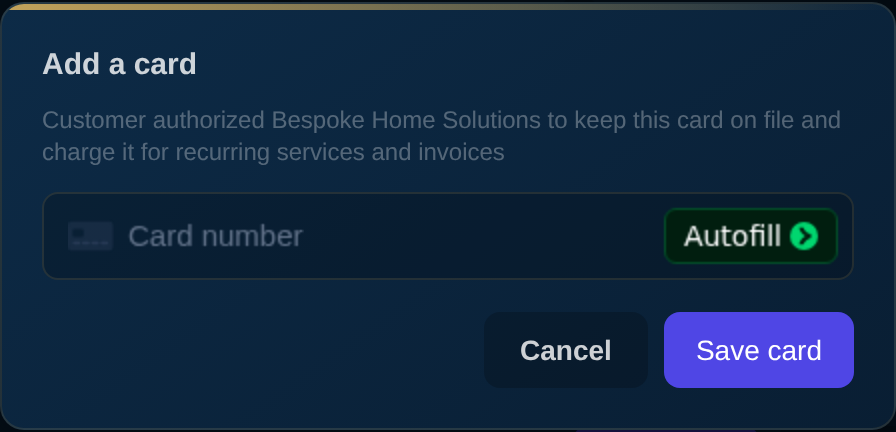
- Under Cards on file, click Add card.
- Read the consent sentence to the customer, enter the card in the secure Stripe field, and click Save card.
Option B: The customer saves it while paying online
When the setting in Part 1 is on, the public invoice page shows "Save this card for future payments to {your company}" above Pay Now. If the customer ticks it, the card they pay with is kept on file automatically and appears on their Recurring tab marked "Saved … online".

Good to know about cards
- A card marked Unavailable was saved on a different Stripe connection than the one your account uses now (for example, after reconnecting Stripe). It is never charged; ask the customer for the card again.
- Expires soon flags a card within 60 days of expiry. Stripe keeps most cards fresh automatically when the bank reissues them, but it is worth a heads-up.
- Remove takes the card off file (and out of Stripe). A schedule that used it falls back to the customer's default card; if none is left, its next cycle is sent for manual payment instead.
Part 3: Enroll a customer in a plan (recurring billing only)
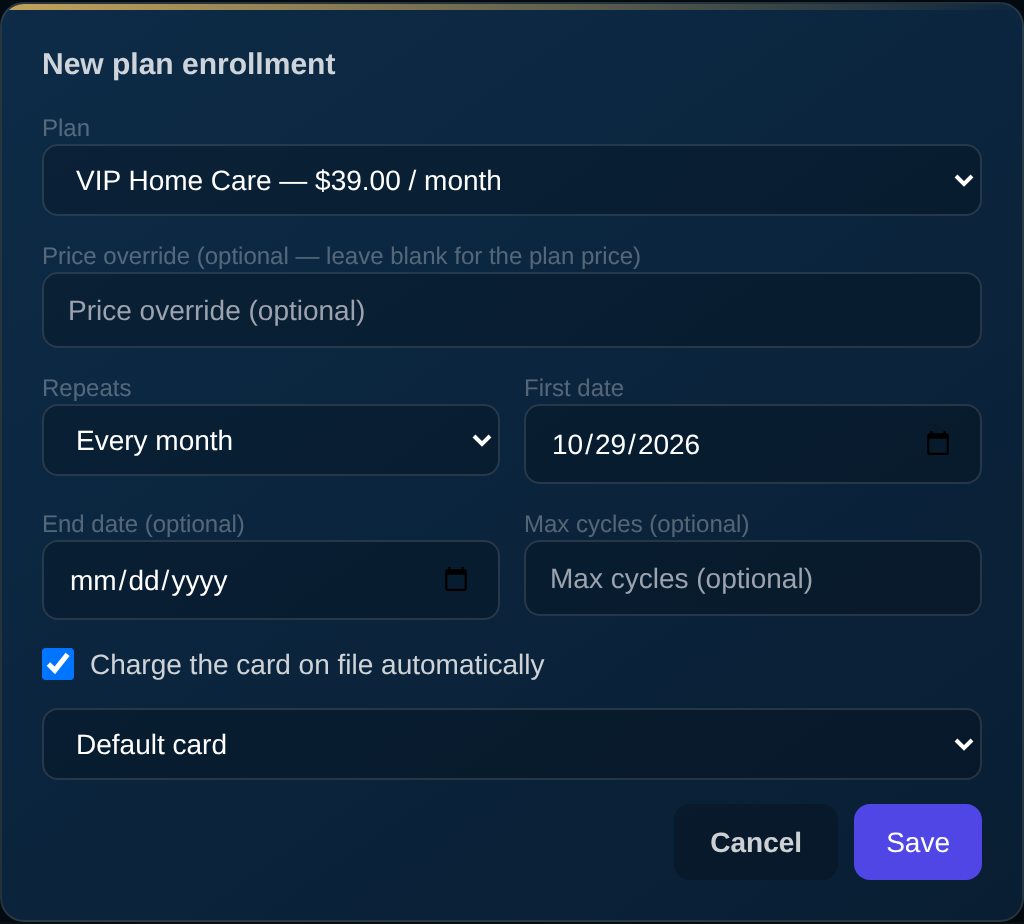
- Open the customer → Recurring tab → Enroll in plan.
- Pick the plan. Leave Price override blank to use the catalog price, or enter a custom price for this customer.
- Set Repeats (pre-filled from the plan; you can change it for this customer) and the First date. The first date is the first billing date; monthly and longer cadences keep that day of the month (a plan started on the 31st bills on the last day of shorter months).
- Optional: an End date or a Max cycles limit. Leave both blank for an open-ended plan.
- Leave Charge the card on file automatically ticked and choose the card (or Default card). Untick it only if you want the customer to pay each cycle's invoice themselves from the emailed link.
- Save.
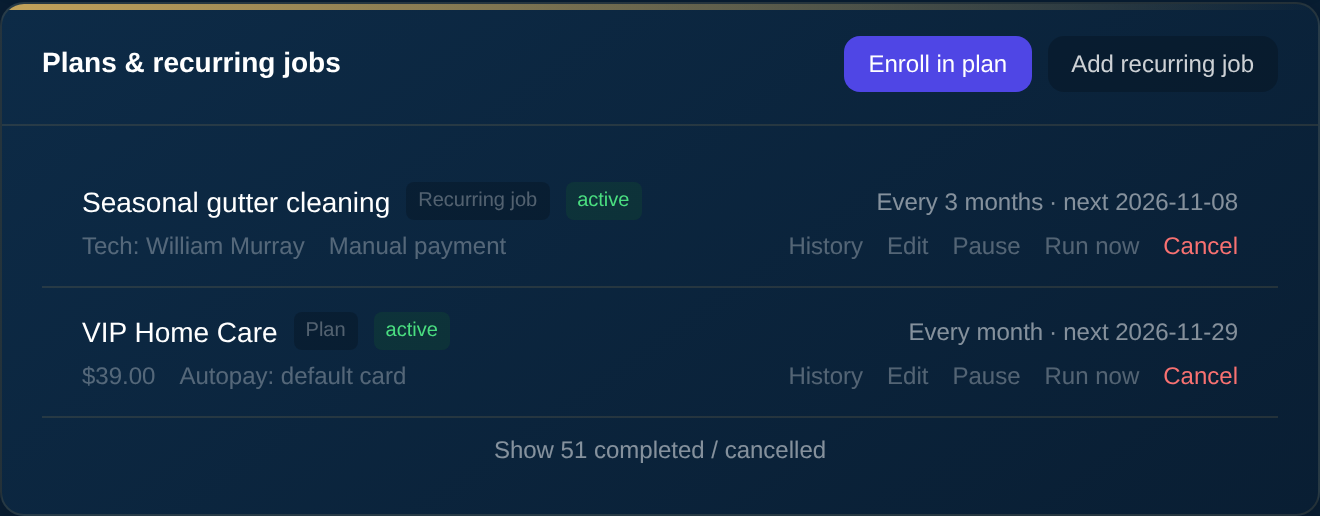
The schedule appears under Plans & recurring jobs with its status, cadence and next date.
What happens on each billing date
- HandymanPro creates a completed job titled "{Plan} — {period}" (for example "VIP Home Care — November 2026") with one line item, and a final invoice from it. The invoice is immediately available on its public link.
- The default card (or the card you chose) is charged for the invoice balance.
- A payment is recorded, the customer gets the usual receipt email (if they have an email on file), and you get the usual "You got paid" notification. QuickBooks sync runs if connected.
- The schedule moves to the next date.
History on the schedule shows every cycle with links to its job and invoice and the outcome (paid, retrying, failed, sent for manual pay, void).

Admins can click Run now to generate and charge the schedule's next cycle immediately, which is handy right after enrolling someone.

Part 4: Set up a recurring job
Use this when the customer gets a real visit on a cadence: seasonal gutter cleaning, a monthly property check, quarterly filter changes.
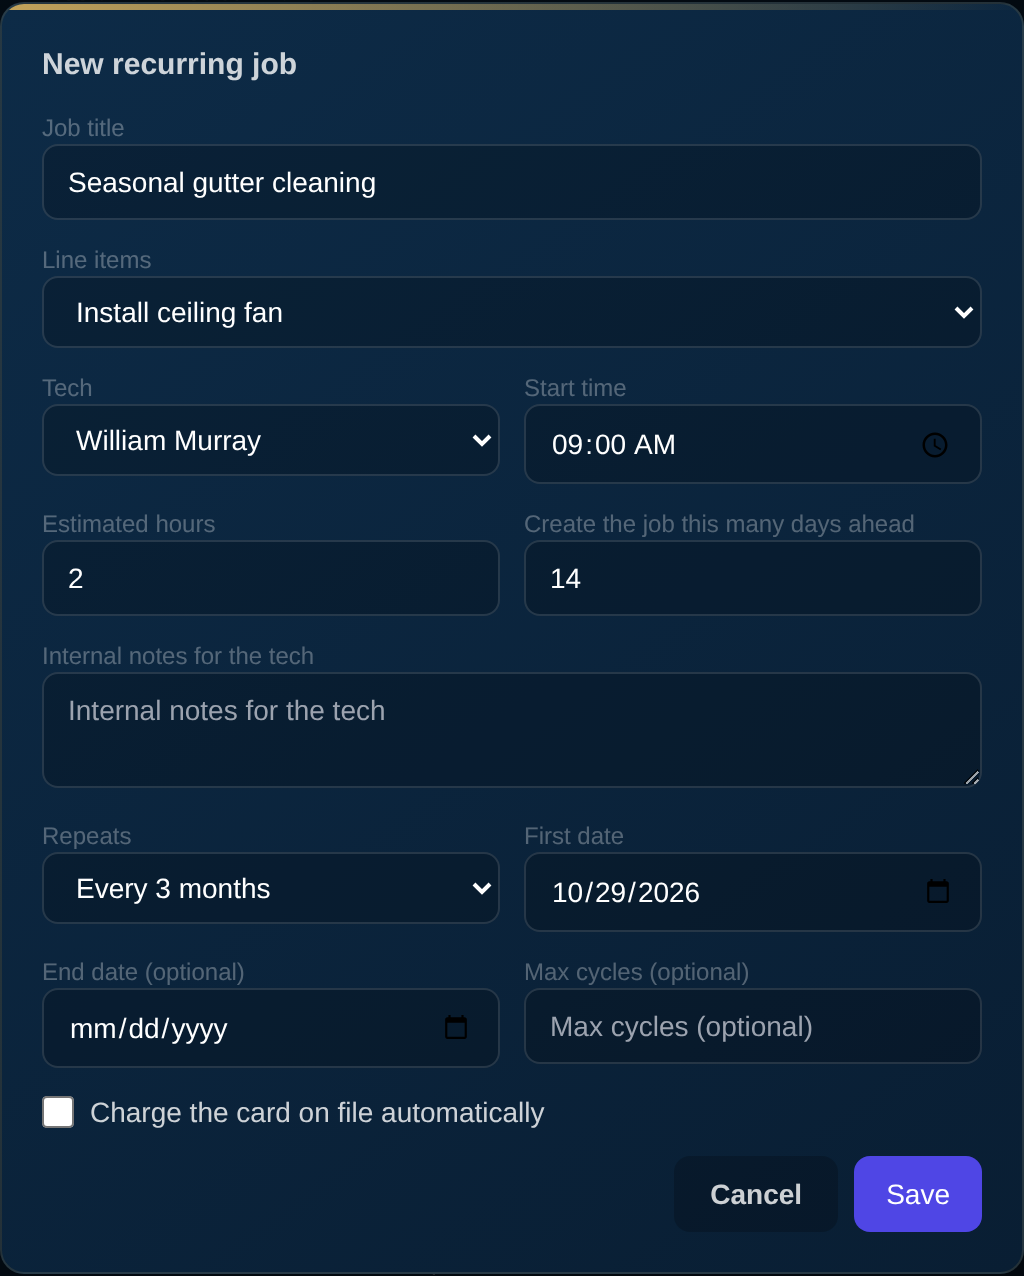
- Open the customer → Recurring tab → Add recurring job.
- Give it a Job title. This is the title every generated job gets.
- Choose the line items: pick a canned job (its labor and materials are copied onto every generated job), or leave that blank and add lines by hand with + line.
- Pick the Tech and a Start time. With both set, each job lands on the schedule already assigned. Leave them blank and each job appears in Needs scheduling for you to place.
- Estimated hours sets the appointment length. Create the job this many days ahead controls how early the job shows up (default 14 days, so the tech sees it coming).
- Add Internal notes for the tech if useful; they are copied onto every job.
- Set Repeats, the First date (the first service date), and an optional End date or Max cycles.
- Charge the card on file automatically: tick it to autopay each visit's invoice once the job is completed and the final invoice is sent. Leave it unticked to bill the customer per visit as you do today.
- Save.
What happens on each cycle
- On the lead-in date, a job is created for the service date with the title, line items, tech, time and notes from the schedule, at the customer's primary address (or the address you picked). It shows on the Schedule like any other job, with a Recurring badge.
- The tech works it and completes it as usual; you send the final invoice as usual.
- If autopay is on for the schedule, the card on file is charged after the final invoice exists. If it is off, the customer pays from the invoice link.
- The schedule moves to the next service date.
If the schedule has no tech or time, the job is created in Needs scheduling instead, and you place it from there.
Part 5: Keep an eye on everything: the Recurring page
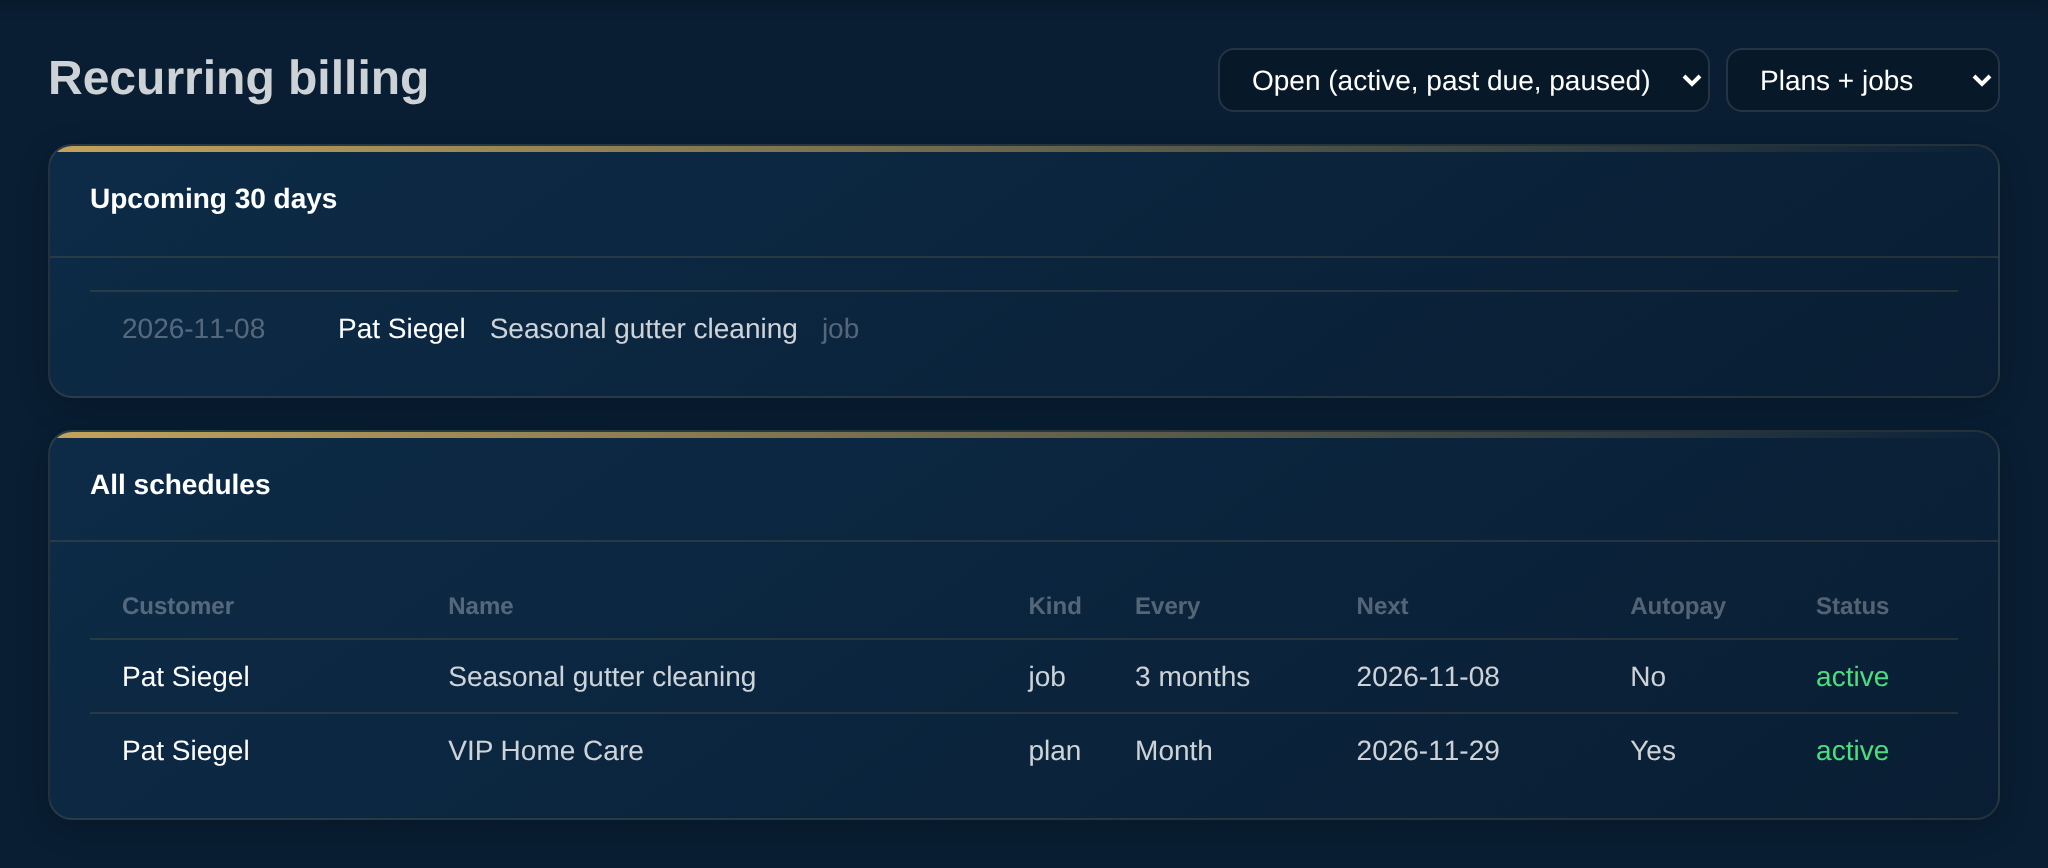
Recurring in the left menu (under Invoices) lists every schedule across all customers.
- Needs attention (red) lists schedules that are past due, autopay schedules whose customer has no usable card, and cards about to expire.
- Upcoming 30 days shows what will bill or be scheduled soon.
- All schedules shows open schedules by default; switch the filter to All statuses to include completed and cancelled ones, or filter to plans or jobs.
Part 6: When a card is declined
- The charge is retried 3 days later, and again 4 days after that (a week in total).
- If it still fails, the cycle is marked failed and the schedule goes past due. Nothing further is charged automatically.
- The customer receives the invoice by email (and by text where your account texts customers) with a note that the card on file could not be charged, a link to pay, and an Update your card link (see Part 8).
- You receive an "Autopay failed" email and a push notification, and the schedule appears under Needs attention on the Recurring page and with a red marker on the customer's Recurring tab.
Some failures are not retried, because retrying cannot fix them: an expired or invalid card, a card the bank reports lost or stolen, a card that was removed from Stripe, or a card that requires the customer to authenticate. Those go straight to step 2.
If the customer has no usable card when a cycle comes due, the invoice is sent for manual payment right away, the schedule goes past due, and you get the same "No card on file" alert.
Getting a past-due schedule going again
Any of these clears it on the next daily run:
- The customer pays the invoice from the link.
- You record the payment yourself on the invoice (cash, check, a phone payment).
- You save a new card and click Charge now on the failed cycle in History.
- The customer adds a new card themselves on the card portal (Part 8) — the failed charge is retried the moment the card is saved.
When the schedule reactivates, its next date moves forward to the next future cycle. Periods that were missed while it was past due are not billed; they appear in History as "skipped while past due" so the record is complete.
Part 7: Pausing, editing and cancelling
- Pause stops future cycles. If a cycle is open and unpaid at that moment, autopay is stopped on it and the customer is sent the invoice link instead. Resume picks up at the next future date; nothing is back-billed for the paused period.
- Edit changes future cycles only: price override, cadence, dates, tech, time, autopay, card. The first date cannot be changed; cancel the schedule and create a new one instead.
- Cancel ends the schedule. Open invoices stay payable, but nothing is charged automatically after cancelling.
- Completed and cancelled schedules are hidden on the customer's tab behind Show N completed / cancelled.
Part 8: Let customers update their own card
Customers do not need to call you when a card expires or is replaced. A secure card portal lets them see their plan, see the cards on file, add a new card, and remove an old one — without logging in, and without you ever seeing card numbers (they go straight to Stripe). A new card becomes the one you charge, and if a cycle was past due it is retried immediately, so the plan usually fixes itself while the customer is still on the page.
There are three ways a customer gets there:
- The declined-card message. When autopay fails, the customer's email and text include an Update your card link alongside the pay link.
- You send it. On the customer's Recurring tab, under Cards on file, click Send card update link and choose Text the customer, Email the customer, or Copy link to paste anywhere.
- Your website. Sites on the HandymanPro Portal Links plugin (1.3.0 or later) get an Update your card on file page at
/update-card/automatically — nothing to set up. The customer enters the mobile number or email you have for them and receives the link by text or email. The page is kept out of your menus and out of search engines; you can edit the wording around the form, and the same form can go on any other page with the shortcode[hp_update_card].
Good to know:
- A link works for 7 days. Sending it again before then re-sends the same link.
- The website form never says whether a number or email matched — it always replies "If we have a card on file for that contact, a link is on its way." That keeps your customer list private.
- Links go out on your own domain (
https://yourdomain.com/card/…) when your customer links are set to use it, so texts deliver reliably. - Customers cannot pause or cancel a plan from the portal; that stays with you.
Questions
Can one customer have several schedules? Yes: a plan and a recurring job, two plans, several jobs. Each is independent.
What does the customer get on a successful charge? The standard payment receipt (if they have an email on file). There is no "we are about to charge you" message; the consent they gave when the card was saved covers the plan.
What if the customer has no email? The receipt is skipped. Invoices created by a schedule still have a public link you can text or print, and a declined-card notice still goes by text where your account texts customers.
Does a plan charge appear in reports? Yes. It is a completed job and a paid invoice like any other, badged Plan billing.
Can I bill a recurring job before the visit? No. Recurring jobs bill after the visit, when the final invoice exists. For a fee that does not depend on a visit, use a plan.
What if the daily run happens twice, or I click Run now twice? A period is billed once. Every cycle is keyed to its date, and every charge carries a unique reference, so a second run on the same day finds nothing to do.
Which day of the month is used? The first date's day. A plan started on the 31st bills on the 28th, 29th or 30th in shorter months and returns to the 31st when the month has one.